 PeteFree.com
Fotodiox m42 Screwmount to Sony Alpha Mount Camera Lens Adapter ─ Home Grinding and Drilling to Make it Function Properly
© 2010 Peter Free
09 November 2010
I have yet to find an inexpensive lens to camera adapter that worked ─ sometimes crude machining will fix it
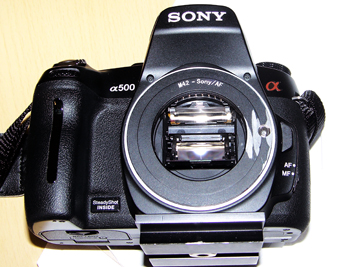
The Fotodiox m42 screw mount to Sony Alpha mount lens adapter I bought would not rotate far enough on the camera body to engage the camera’s lens release prong.
The adapter’s flange plate was too thick relative to its bayonet depth.
This flaw created two lens-mounting problems:
(i) If I left the adapter on loosely, so that I could get it off, it might fall out of the camera body along with the lens.
(ii) If I forced the adapter on until it was somewhat secure (but still short of the proper position), I had serious problems getting it off.
I had to use a small screwdriver inserted into the adapter’s bayonet release prong hole to twist it off. Scratching the camera’s lens mount with the tip of the screwdriver was likely to happen sooner or later.
Not good.
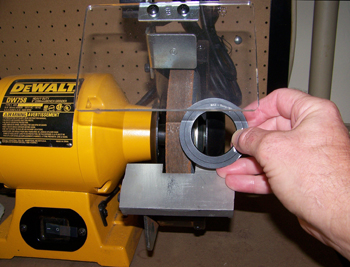
Grinding a too-thick adapter
Precision grinding is not necessary. I used a very basic bench grinder and a battery-operated drill.
Steps:
1. Wearing eye protection, grind the raised narrow rim at the very outer edge of the camera side of the adapter until it is flush with the rest of the flange.
If you have a two-wheel grinder, it’s faster to start on the rough (fast cutting) stone. Even though the adapter is aluminum, the fine stone ground too slowly.
Don’t worry about maintaining an absolutely level plane of contact. That kind of precision is probably not possible on a grinder of the type I’m shown using.
You can burn yourself, if you leave the adapter in contact with the grind stone too long.
2. Smooth the rough grind with the fine grinding wheel, followed by medium or fine grit sandpaper or a sanding block.
3. Wash the adapter in water, preferably using a kitchen sink sprayer.
4. Use a hair dryer to dry it. (A towel can leave lint or threads that you will not want in your digital camera.)
5. If you are anal (as I sometimes am), use canned air to do a final cleaning.
6. Try the adapter on the camera.
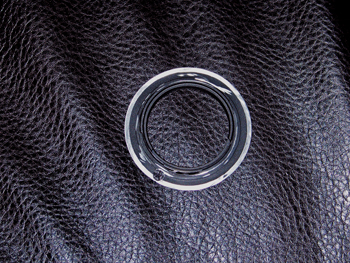
If it still will not rotate far enough for the adapter’s hole to slip over the bayonet release prong on the camera body, you will need to drill the adapter hole wider. On mine, the adapter’s original hole was rectangular with rounded ends. After drilling, it will be round.
7. Put the adapter’s flat (front) face down on a piece of flat wood. Using two or three progressively wider drill bits, drill the hole wider.
The goal here is to make the hole’s diameter wide enough to slip over the bayonet release prong, without having to take more than the raised peripheral rim material off the adapter’s flange.
The wider the hole, the less far the adapter needs to rotate on the camera body to allow the hole to properly mate with the release prong. Making the adapter’s release hole bigger is a way of avoiding having to flat grind the entire width of the adapter flange.
8. Grind the drilling burrs from both sides of the flange using the fine grinding wheel. Sand.
9. Repeat the washing, drying, and blowing process.
10. See if the adapter fits.
Checking the results of your modification
If the adapter fits, mount an m42 lens and take some pictures. Check them afterward on a computer.
Assuming that you already know that your m42 lens is optically centered (having used it on another camera), out of focus areas in the focus plane means that the modified adapter is not parallel with the camera body.
If you have already ground away all of the raised perimeter rim, trying to evenly flat grind the rest of the flange is probably going to be more trouble than it is worth.
Salvaged or not, I won’t be buying another Fotodiox product
In my case, the crude repair process worked. But I will probably not buy another low cost adapter. I’ve tried three from apparently different manufacturers. None worked.