 PeteFree.com
Using the Olympus E-P3 with Its Popup Flash and a Remotely Controlled Olympus FL-300r — Attempting to Balance Window Daylight with a Not Too Dark Room Interior — and FL-300r as Fill — with a Related Comment on Olympus’ Penchant for Fiddly Operation — Review
© 2013 Peter Free
14 March 2013
The Olympus FL-300r (hot shoe mount) flash works just well enough for limited purposes
My primary purpose in doing this review was to see whether an Olympus FL-300r flash was powerful enough to allow me to retain proper exposure in daylight windows, while adding compensating fill light to the much dimmer room.
It is — at least, if used without light modifiers — and if you are willing to post process the results.
During the testing process, I also experimented with the FL-300r as an on camera fill light outside in bright sun.
That worked, too. After a fashion.
First, recognize that the E-P3’s popup flash is grossly underpowered in most circumstances
An example of what this can lead do is buried in my “what can go wrong, does” story, here.
The E-P3’s popup appears to be essentially identical to the near worthless one on the E-PL1. Which was so bad (for my purposes) that I abandoned the camera in favor of the (flawed in other ways) Sony NEX-3.
The rationale for the FL-300r
I often find myself trying to photograph rooms (for memory’s sake), while on the road. Supplementary light is useful, so as to properly expose daylight windows, while keeping the interior of the room visible.
Would the diminutive FL-300r, in conjunction with the E-P3’s popup flash, work for this purpose?
The FL-300r flash does have its share of compromises
The FL-300r appears not to be especially popular.
It is arguably underpowered (running on 2 AAA size batteries), takes noticeable time to cycle, and lacks most adjustments. To run it, either on camera or off, you need to pair it with the camera body’s control system.
In return for these annoyances, the flash’s very small size gives it pocketability and admirably light weight.
Note
Keep in mind that the unit’s small size and unconventional shape make it difficult to conveniently fit a wide range of light control accessories.
Regarding the FL-300r’s somewhat surprising daylight power — at close ranges
My main interest in the FL-300r was to see whether it would work to provide balancing fill inside and out.
The logical place to start was to see how it worked outside, as fill in sunlight and shade.
I started with shade, shooting from shade into a bright background.
Below — no flash, ISO200, manual exposure, f9 at 1/160

Below — FL-300r, on camera, set a full power (via the camera flash menu), ISO 200, manual exposure, f9 at 1/160

You can see that the fill effect does show. But considering that I was standing a couple of paces from the trash cans and out of the bright sunlight — the fill effect seemed as if it would not carry over to subjects that were significantly farther away or located in dramatically brighter light.
So, I was surprised to find that the FL-300r managed to cope with the below subject at f14 (instead of the previous f9). The bright sun picture consisted of a white vehicle, with specular highlights, a black tire, and a shadow underneath.
You will be examining the shadow located in the extreme lower right corner of each of the two following frames.
Here, I was standing 15 feet (4.6 meters) away from the tire and 14 feet (4.3 meters) from the shadow.
The camera’s zoom lens was set at 40mm — which on the micro four thirds sensor is equivalent to an 80mm lens on an “FX” sensor.
Below — no flash, ISO200, manual exposure, f14 at 1/160
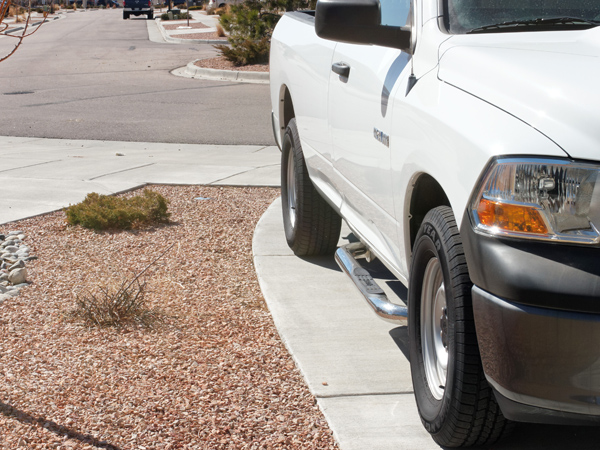
Notice that the shadow to the right side of the tire is impenetrable in the above picture.
Below — FL-300r, on camera, set a full power (via the camera flash menu), ISO 200, manual exposure, f14 at 1/160.
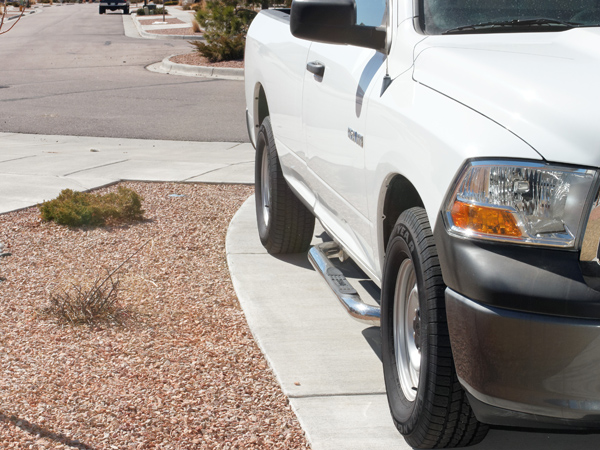
You can see that the FL-300r has opened up the shadow to the right of the tire. Not bad for such a tiny flash unit.
But how about its utility as an indoor flash?
FL-300r, on camera — daylight room with closed blinds
The FL-300r is dramatically better than the E-P3’s popup flash.
Below — FL-300r (on camera) aimed forward at the bed (direct flash). Flash in manual mode, one-eighth power (set via the camera body). Camera settings: ISO 400, manual exposure, f4 at 1/160.
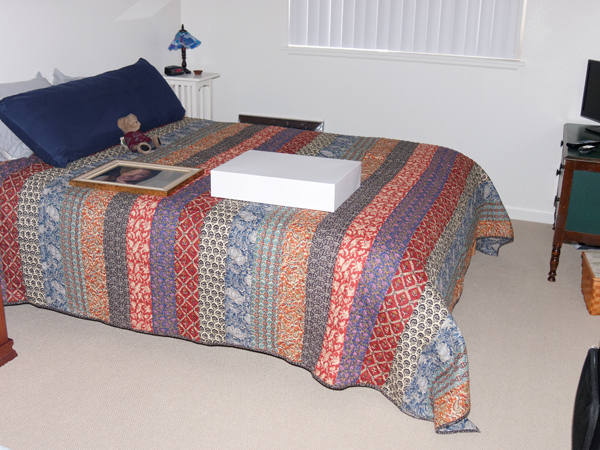
Notice how blue the light looks in the above picture. (The camera was on automatic white balance.)
Below — FL-300r (on camera) aimed at the white ceiling (ceiling bounced flash). Flash in manual mode, one-half power (set via the camera body). Camera settings: ISO 400, manual exposure, f4 at 1/160.
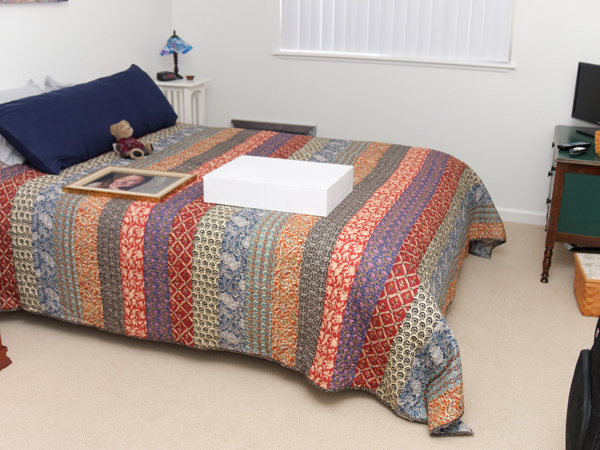
Notice how the light has warmed up a bit, apparently due to the off-white color of the ceiling. (The camera was still set to auto white balance.)
FL-300r, on camera — daylight room with bright, north-facing windows
Not quite so good here.
The camera settings — which were necessary to keep the bright windows from completely blowing out — challenged the FL-300r’s power over distance. To see much of any effect, I had to put the flash unit on its narrow setting.
Note
The FL-300r has two width settings, controlled via a sliding switch on its side. The wider of the two positions is intended for focal lengths between 9 and 14 millimeters.
In practice, I found that most situations involving daylight (inside or out) required that I set it to the narrower of the two positions.
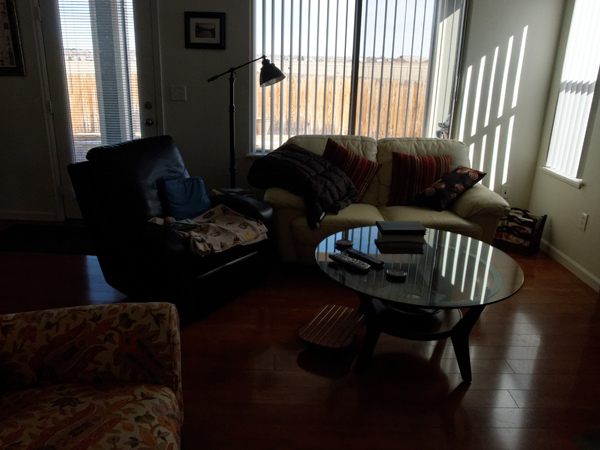
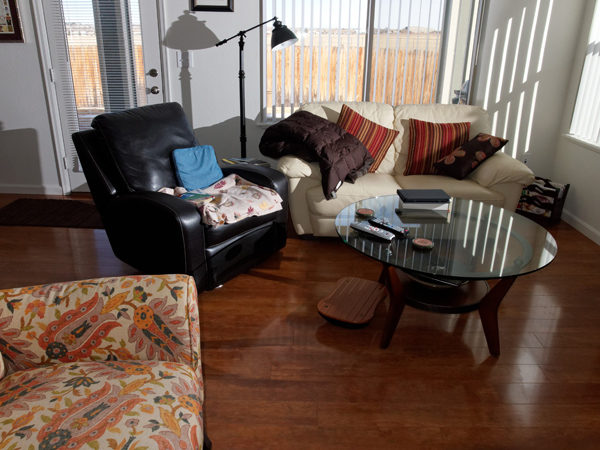
Below — a shot (taken earlier) of the room without flash. Camera settings: ISO 400, manual exposure, f9 and 1/160.
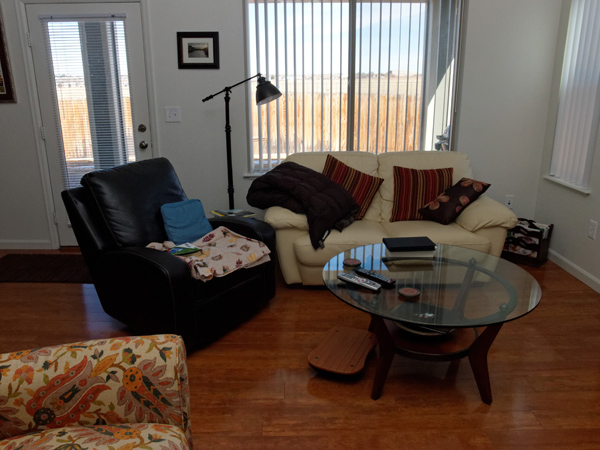
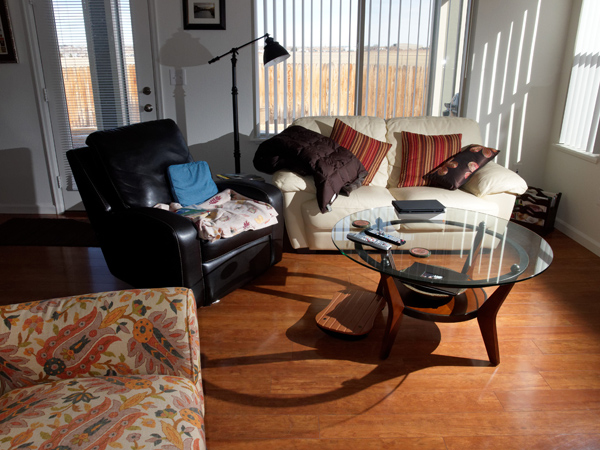
Below — FL-300r, on camera, aimed forward at the glass table (direct flash).
Below — FL-300r, on camera, aimed at the off-white ceiling (ceiling bounced flash).
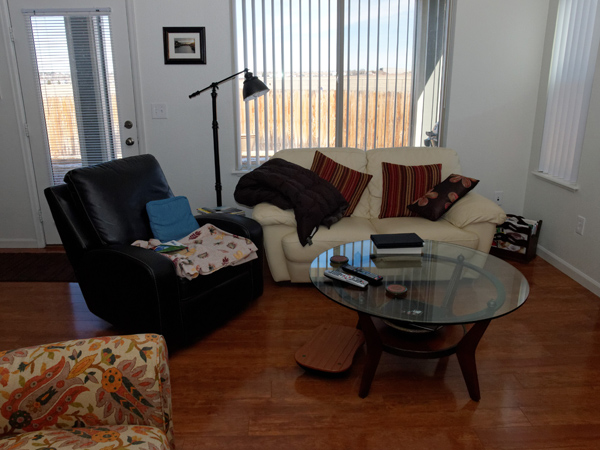
The difference between these two pictures is almost indiscernible.
If you look closely, you can see that the orange pattern in the nearest chair arm is slightly brighter in the direct flash photo than in the bounced one. The floor in the direct flash picture is also slightly brighter. But, taken together, the results demonstrate just how little the FL-300r is able to contribute as fill light toward the farther reaches of the room.
FL-300r, off camera remote operation — in conjunction with popup flash — daylight room with bright, north-facing windows
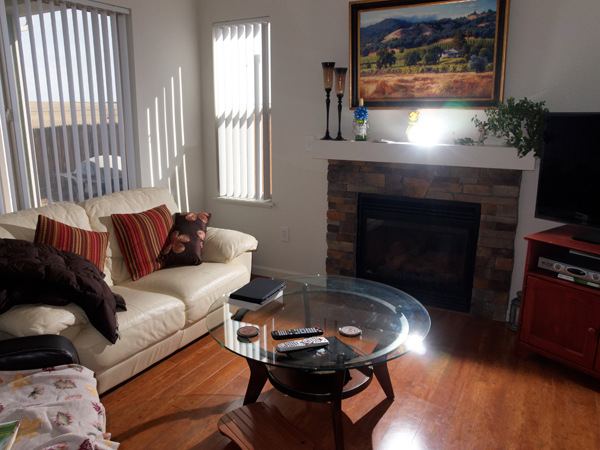
For these, I used the popup flash, along with the FL-300r (remotely controlled from the camera body). The FL-300r is sitting on the fireplace mantel.
Below — showing the remotely controlled FL-300r sitting on the mantelpiece (which will be to the right side of the subsequent scenes). Camera settings: ISO 400, manual exposure, f9 at 1/180. Both flashes at full power (set via the camera menu).
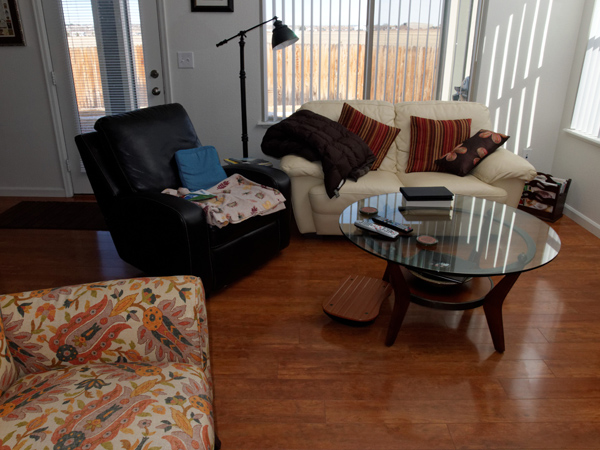
Below — FL-300r on the mantel and angled toward the sofa, camera popup flash activated, both at full power, and camera set to ISO 400, manual exposure, f9 at 1/180.
Below — FL-300r on the mantel and angled toward the glass table, camera popup flash activated, both at full power, and camera set to ISO 400, manual exposure, f9 at 1/180.
Below — FL-300r on the mantel and angled upward toward the white ceiling, camera popup flash activated, both at full power, and camera set to ISO 400, manual exposure, f9 at 1/180.
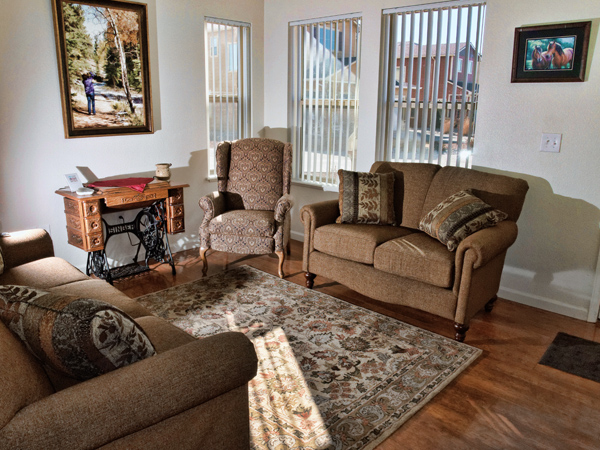
FL-300r, off camera remote operation — in conjunction with popup flash — daylight room with bright, south-facing windows
Next is a post-processed example of a room interior that would have been only dimly visible, without the flash supplementation.
Notice that the camera settings have changed from f9 to f11 because the south-facing room windows here were significantly brighter than the north-facing windows in the immediately above (glass table) set.
Below — FL-300r on a table at the far end of the sofa, angled toward the antique sewing machine table, camera popup flash activated, both at full power, and camera set to ISO 400, manual exposure, f11 at 1/160.
“Well, Pete, would one FL-300r and the camera’s popup flash serve as a light travel kit for photographing room interiors during the day?”
Maybe, but two or three FL-300r units would boost one’s chances of achieving properly distributed light.
And keep in mind that, unless you craft some light modifiers, you’re going to get the usually unappealing appearance of direct flash.
As you can infer from the above photos, both flashes were tested by the small apertures required for properly exposing daylighted windows. I arguably overexposed the windows by one or two stops just to get the setups that I used in the above illustrations to work.
My overall sense is that a committed Olympus user could make the popup plus FL-300r approach work with reasonable consistency, only if they like to post-process. And I would take a minimum of two or three Fl-300s, so as to better distribute the interior light.
The main question will be whether you can tolerate the direct flash look that an unmodified FL-300r is going to give you. If you modify it in any considerable way, its output is going to drop below a useful level.
An aside on the E-P3’s fiddly nature
Especially observant readers will have noticed that my shutter speed jumped from 1/160 to 1/180 — when I transitioned from using the FL-300r on camera (in the room with the glass table) to using it as a remote positioned on the mantelpiece.
That’s an example of one of the “fiddly camera” mistakes that I often make with the E-P3.
In this instance, Olympus apparently decided that one should not be able to alter manual exposure settings, while the camera is in remote control flash (RC) mode:
This means that whenever you do want to change your manual exposure settings — while in remote control flash mode — you have to cycle back into the RC menu to turn remote control flash to off.
Then click on the exposure compensation portion of the command dial, so as to bring up the ability to change either shutter speed or f-stop (or both).
After making the change, via spinning the command dial, you have to return to the Menu button to find the remote flash control menu again. Then, click a few times within the menu to pull up the RC setting. Click to the “on” setting — and shoot.
This interminable menu jumping and clicking/spinning much expands one’s ability to screw something up under shooting pressure. Especially because the command dial changes function, depending on which menu item you’re on.
The above example is not an isolated one. I have written about the E-P3’s irritating fiddliness before — under circumstances that generalist photographers frequently experience. It can be a profoundly annoying camera for people who need the camera to work now, as opposed to (metaphorically speaking) next week.
The moral? — FL-300r and popup flash — too much of a compromise for professional looking results, but maybe good enough for hobby and travel purposes
The E-P3’s popup flash is useless for balancing interior light with daylight windows.
Adding just one FL-300r is okay for night work, but only marginally so for daylight. An Olympus FL-600r would be much better. And its shape would allow use of light modifiers that are popular with professionals and serious amateurs.
But, practically speaking, I would be reluctant to invest in the FL-600r to add to an Olympus system that I find significantly less practicable, overall, than a semi-pro to professional DSLR.
Once we start adding multiple normal size hot shoe flashes to a small sized system, we wind up cancelling some of the merits of the less bulky camera bodies and lenses — without gaining anything in terms of ergonomic utility in the process.
For me — writing as someone who carted heavy medium and large format equipment around for years — that doesn’t make a great deal of sense. I would probably try to make do with multiple FL-300r units.
Note
As of this writing, if you are patient on eBay, you can find these units for about $80 to $100. Which, to my mind, makes them a good value.
On the other hand, the FL-300r’s New York retail price of $140 seems a bit much in comparison to the price-benefit ratio conferred by Olympus more expensive full sized units.
If you are already a dedicated micro four thirds user, it might be advisable to spring for the more expensive FL-600r, despite its size, simply due to its expanded power and overall utility.