 PeteFree.com
DxO ViewPoint — a Mini Review
© 2012 Peter Free
19 November 2012
Worth buying — if you want a quick and reasonably competent fix to commonly encountered photographic distortion problems
DxO ViewPoint comes in stand-alone and Adobe Photoshop/Lightroom plug-in versions. I bought the former. Cost, as of this writing, is $79 USD.
Note
I selected the stand-alone version because DxO’s Optics Pro 7 (for example) boots slowly and crashes more frequently than my other photo programs. If the ViewPoint Photoshop plugin acts similarly, I was concerned that it might cause problems with Photoshop.
The best review that I have yet seen of ViewPoint is Imaging Resource’s, here. That review’s examples are illustrative, but they don’t show extreme corrections.
So, I selected a few badly distorted photos of my own to challenge ViewPoint’s keystoning tool.
How I did this test
I have a film era Tokina 17mm f3.5 lens (the first version, with the fixed lens shade) that produces significant distortion, even on cropped digital sensors.
To minimize imaging distortion from this lens, one has to hold the lens axis parallel to the ground and perfectly level. Vertical objects have to be placed exactly at the lens’s optical center.
Obviously, one can’t always use a wide angle in this ideal manner. So, when I bought the Tokina, I challenged it with near-to-far assemblages of verticals and horizontals, so as to see what I would have to correct in post-processing.
ViewPoint’s keystoning tool — works well
The tool works by adjusting either (or both) vertical and horizontal axes. In its dual mode, the tool gives you two side-by-side vertical axes and two (upper and lower) leveling axes to play with. These show on a highlighted rectangular preview overlay.
The keystone tool also includes a slider that allows the user to adjust the ratio of horizontal to vertical correction. This slider allows users to readjust the corrected image to the visual proportions they want.
Examples of ViewPoint’s keystoning and anamorphosis correcting power
In the picture just below, notice the two oppositely splayed brick wall verticals.
The lens tilted both brick corners because neither was placed perpendicular to its optical axis. With this lens, verticals to the optical left tilt left, and verticals on the optical right tilt right.

In the below correction, I used ViewPoint’s keystoning tool to correct both brick verticals, as well as the background level.

Next, we’ll throw in ViewPoint’s anamorphosis correction. This tool has two flavors (represented by icons), one “fat” and one “skinny.” The fat one tries to correct bloat at the edge of the frame. The other corrects “skinny-making” lens distortions. Neither of these corrections can be adjusted or placed. You take whatever the tool gives you.
In the below picture, I used ViewPoint’s “fat” anamorphosis tool. It slightly corrected the right side brick wall’s proportions.

Finally (below), I used ViewPoint’s Horizontal to Vertical Ratio keystoning tool to slightly adjust the rectangular crop that the above correction processes had given me.

All these ViewPoint corrections will introduce compensating distortions somewhere else in the picture
Below is an example of this. While testing the Tokina lens, I deliberately placed the pillar in the below picture off center to the right. That meant that lens distortion tilted it rightward.
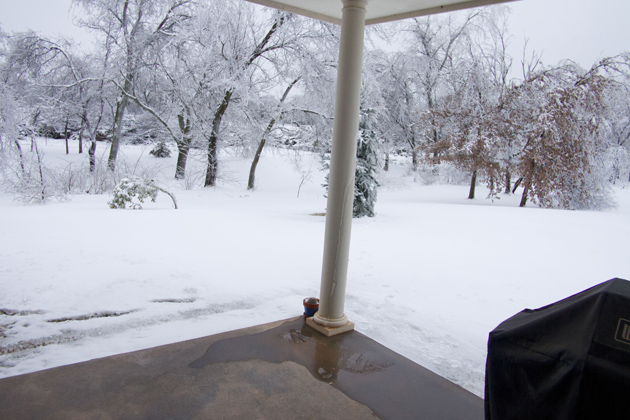
To correct the pillar’s verticality, I adjusted the lower of ViewPoint’s two keystone leveling lines downward on the right (at the pillar’s base). I left the upper leveling line alone because the background tree line was already horizontal enough.
Note
I could have adjusted the pillar with the keystoning tool’s right vertical adjustment. But my limited experimentation showed that the leveling adjustment worked better for this frame.
Notice how this simple correction stretched out the left side of the picture.

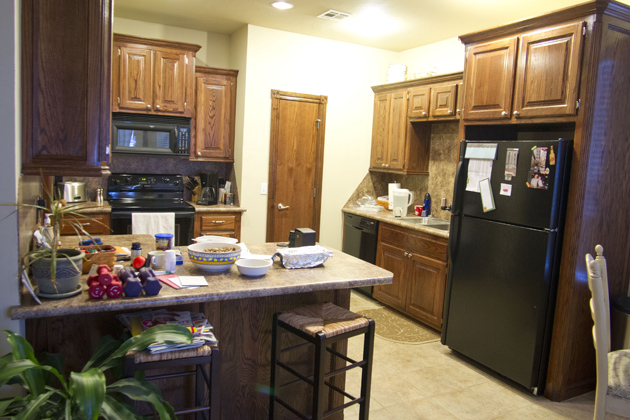
An indoor example of a more complicated keystoning problem
As soon as you bring a distorting lens inside a room, the near-far relationship of vertical and horizontal axes is going to challenge it.
The spherical nature of optical imaging is going to result in straight lines being distorted in different directions, depending on where they are relative to the lens’s optical axis.
Earlier, we saw that the Tokina 17mm slants verticals different ways, depending on whether they are right or left of the optical axis. The same is true (of course) for horizontals.
I populated the below kitchen picture with various objects at different distances to see how the lens would distort their shapes.
The picture below shows how I used ViewPoint keystoning to correct the right side vertical near the refrigerator.
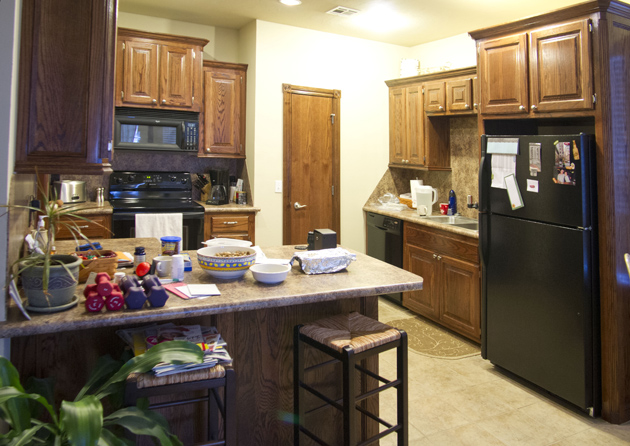
Below, I used keystoning’s left vertical adjuster to slightly correct the over counter cabinet on the left side of the frame.
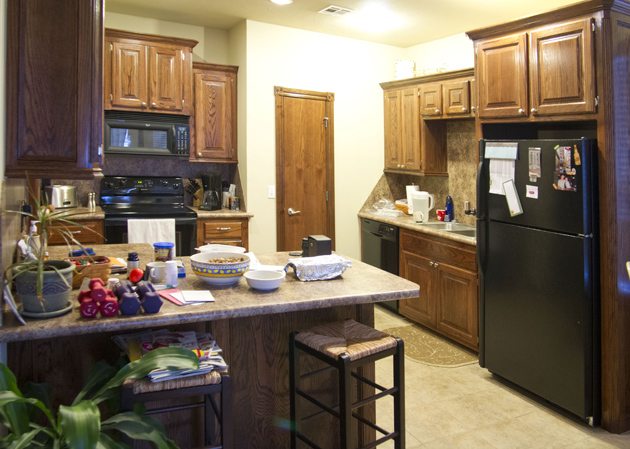
Then, I used ViewPoint’s dual leveling lines to make slight corrections to central counter space and the upper part of the pantry door adjacent to the stove.
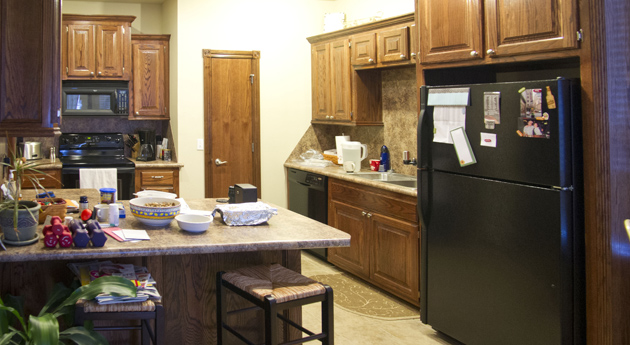
Finally, I adjusted the Horizontal to Vertical Ratio slider to minus 7.

The above pictures demonstrate that distortion correction is a matter of taste
In most cases, I don’t mind lens distortion, even with tilting verticals or horizontals.
But there are instances when distortion and perspective nuances matter. And that’s where ViewPoint is valuable.
Caveat — ViewPoint is not quite as easy to use as some people might expect
ViewPoint’s keystoning tool frequently over-corrects compared to one’s expectations.
In other words, placing one of ViewPoint’s correcting axes parallel to a tilted element in the picture sometimes grossly overcorrects it, tilting that element noticeably beyond vertical or horizontal. The user only discovers this after clicking on “apply.”
If the result is not to one’s satisfaction, one has to start over, with less of correction.
This “not quite what you expect” problem quickly becomes complicated, when you are adjusting all four of the keystoning tool’s axes.
Consequently, I often find it more efficient to adjust only one axis at a time, save the result, and add another adjustment to the new file. Which brings us to one of ViewPoint’s minor annoyances.
A minor (probably unavoidable) annoyance
If you do one-at-a-time axis correction, you will often need to save the corrected file separately. I found that ViewPoint erased my previous corrections from the preview panel, whenever I clicked on another icon within the same tool.
Pertinent here, the keystoning tool has three icons that control vertical and horizontal axes. One shows tilting verticals, the next shows tilting horizontals, and the last shows both.
If you click from one these icons to another, the corrections that you made under the icon that you are leaving disappear from the preview panel. This makes sense because adjusting verticality has an effect on horizontality.
That said, I still found this trait mildly annoying because sometimes I wanted to save the effects of what I had just done and then readjust another element from there.
Someone more expert than I am in ViewPoint might have a way around this minor problem. However, this kind of “get in the way” automaticity (combined with a lack of transparency in the user interface regarding it) seems to be characteristic of DxO software. It is one of traits that I do not like about DxO Optics Pro (which I commented on, here).
ViewPoint’s horizon tool works well — and in one step
ViewPoint horizon tool corrects camera leveling errors with essentially two clicks.
The user enters either a correction angle into the active box or uses the up and down arrows (or the cruder sliding spectrum scale) to show the direction and amount of correction.
Increments are in tenths of a degree. One mouse click per tenth. If you hold the mouse button down, the direction arrow speeds through the tenths.
When the highlighted overlay in the preview panel — which shows how the photo will be cropped after the correction — looks good, click on “apply.” ViewPoint automatically crops the frame.
This precision-oriented tool works really well.
Recommended — even if you already own DxO Optics Pro 7 or 8
ViewPoint allows significantly more control over these corrections than Optics Pro seems to. The software is also (arguably) somewhat easier to use than Photoshop for these kinds of corrections.