 PeteFree.com
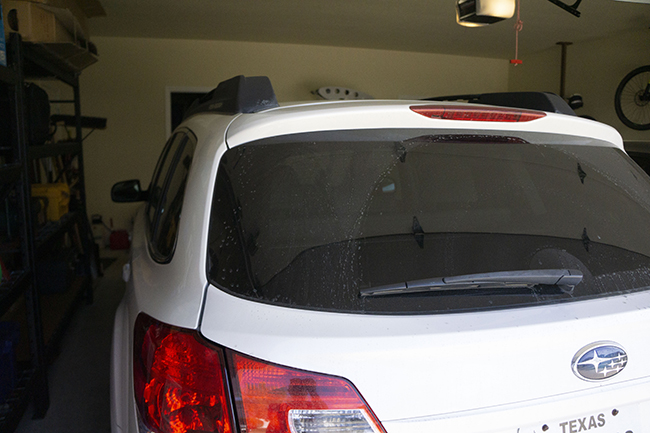
2010 Subaru Outback — how to replace the tail light bulbs — located in the hatch back lid
© 2019 Peter Free
20 April 2019
Which bulb are we talking about?
Let's clear up some mistaken YouTube terminology. Virtually all of the 2010 (and later) Outback videos refer to all four of that car's rear (non-brake, non-backup) lights as tail lights.
In actuality, they are not all tail lights. Two of them are side marker bulbs, which you can see from both the side and rear of the car. They are located inside lamp housings on the corners of the car body.
These side marker bulbs are easy to get to. A number of YouTube videos show how to replace their W5W bulbs.
The bulbs that I am addressing today are the "true" tail lights. These are the ones that you can only see from the rear of the car. Those two W5W bulbs are located inside the hatchback lid.
Do not confuse these lower lid lamp housings with the lamp that lives at the top of the hatch lid. There are a couple of YouTube videos that show you how to access the top housing. You need to remove the whole hatchback trim panel.
I found no videos showing how to replace the "true" tail light bulbs.
Tail light access — another silly Subaru design
Regarding Subaru's penchant for occasionally silly design, read my "how to" regarding front side marker bulb replacement. That blurb contains a note regarding the equally idiotic 2010 Outback headlight bulb replacement process.
With regard the tail light bulbs that we are addressing today, there are two removeable plastic hatch covers on the Outback's hatchback interior trim panel. One on each side.
There is a small notch at the outside (of the car) vertical edge of each of these small access covers. A small screwdriver should be able to get these off. However, I used a trim panel tool, like the one pictured below.
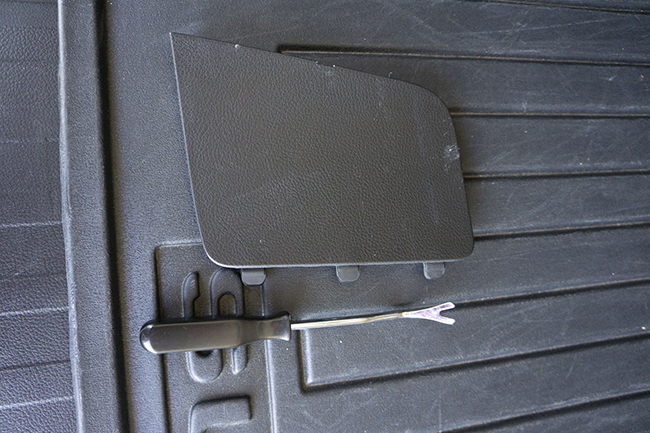
Insert one edge into the notch and work your way along the notch side edge of the cover. The cover's main holding tabs are on the opposite side. If you pry that side, you will probably break one or more of those tabs.

In the following picture, the top of the opening is to your right. You can see the lid's hatchback glass there.
The bottom of the access opening is to your left.
The tail light bulb is in the white plug that you see toward the right (upper) side of the opening.
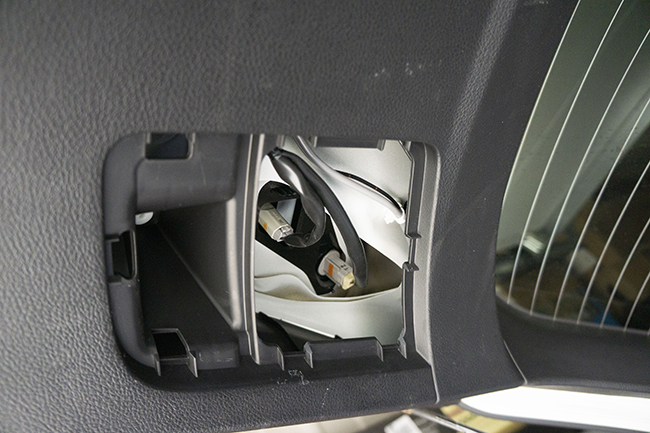
People with large, and even medium-sized hands, are going to experience appreciable difficulty twisting the tail light bulb plug out of the lamp housing. You have to rotate the plug enough to gets retention tabs to come through notches built into the lamp housing.
See shaggydog1's understandable irritation with this tight space process, here.
What to do?
I used a pair narrow-jawed pliers to partially hold the end of the socket plug (which holds the bulb) and twist. It took several tries to rotate and then pull the plug out of the lamp housing socket.
Once the W5W bulb is replaced — it just slides into the plug that holds it — getting that plug back into the housing can be a challenge. My pliers could not get enough grasp on the protruding plug (which needs to be twisted into place), due to the perverse angle of access.
Part of this difficulty comes from Subaru's decision to make one of plug's four protruding twist tabs larger than the other three.
Ordinarily one would think such a design was intended to properly orient the bulb in the housing. But for bulbs like these, there is no up and down or side to side. All the tabs could be the same size, and no one would know the difference. The plug would go back into its socket with much less fuss.
The plug and socket are, apparently intentionally, designed to be a PITA to properly connect. Subaru is probably hoping that you will give up and pay them $150 (or so) to replace your $2 bulb.
The trick is to get the tabs and notches connected and then painfully twist just enough to keep everything in place. Otherwise, the plug instantly falls back out.
I found that the only way I could accomplish this was to get my fingers partially trapped under the plug's short connecting wires. I was eventually able to twist the plug just enough to hold it in place in the lamp housing. Finally, remove your fingers without undoing the retaining rotation.
It took me several tries, and patiently repressed curses, to pull this off.
An addendum — for those who are a bit soured on these later generation Subarus
See the deservedly much appreciated YouTube auto mechanic, Scotty Kilmer:
here — boxer engines
here — turbocharged Subaru boxer engines
here — Subaru CVTs
here — massively large Subaru recalls